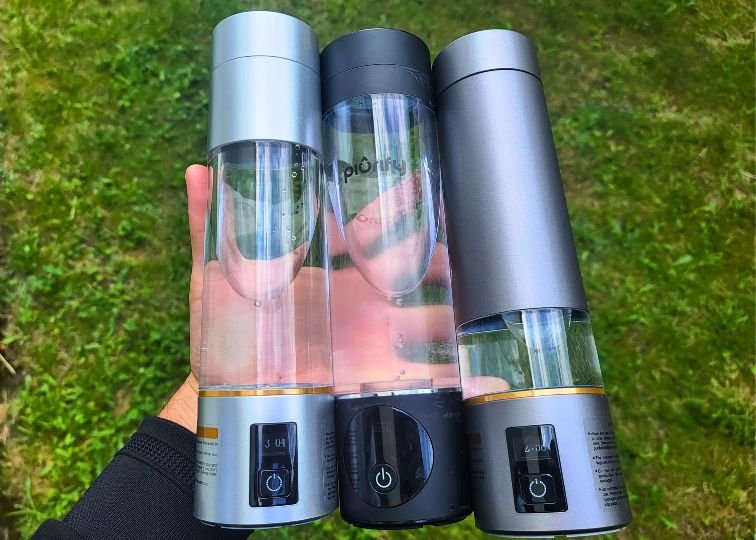
I used to think the best water bottle was the one that kept ice cold the longest. Then I started washing more than 100 of them. That changes your standards fast.
For this list, I focused on the part nobody gets excited about until it becomes annoying: how easy these bottles are to clean after normal, everyday use.
These are the bottles I’d happily wash again, plus a few popular ones I’d rather not meet at the sink.
Some of the links on this page are affiliate links. This means that if you click on one of the links and make a purchase, I may earn a small commission at no additional cost to you.
YETI Yonder | Nalgene Wide Mouth | Hydro Flask Trail Series | Coldest Bottle | Hydro Flask Wide Mouth | |
|---|---|---|---|---|---|
 |  |  |  |  | |
Recommended Size | 25 oz | 32 oz | 24 oz | 32 oz | 32 oz |
Price | $25 | $17 | $45 | $40 | $45 |
Material | Tritan Plastic | Tritan Plastic | 18/8 Stainless Steel | 18/8 Stainless Steel | 18/8 Stainless Steel |
Cleaning Time | 1:38 | 1:54 | 1:54 | 1:58 | 2:06 |
Parts | 3 | 2 | 3 | 3 | 3 |
Cleaning Tools | Narrow bottle brush | Narrow bottle brush, straw brush optional | Narrow bottle brush, small brush around gasket, toothpick | Narrow bottle brush, small brush around gasket and spout | Narrow bottle brush, small brush around gasket, toothpick |
Review | |||||
Buy Now |
How I Ranked the Easiest Bottles to Clean
I judged each bottle using three things.
First, I timed how long it took me to disassemble and clean the bottle. I didn’t include the full drying time or final reassembly in the official cleaning time because you usually have to wait for the parts to dry anyway. But if a bottle is annoying to put back together, I mention that too.
Second, I looked at the number of parts. Fewer parts usually means faster cleaning, but not always. A two-part bottle with weird grooves can still be more annoying than a three-part bottle with a clean, simple lid.
Third, I looked at the equipment needed. Some bottles can be cleaned with a sponge and your hand. Others need a long bottle brush, a straw brush, a toothpick, and the patience of someone assembling IKEA furniture without instructions.
For most people, I still recommend owning a basic bottle cleaning kit: a long narrow brush and a straw brush. You’ll use both more often than you think, especially if you drink anything other than plain water.
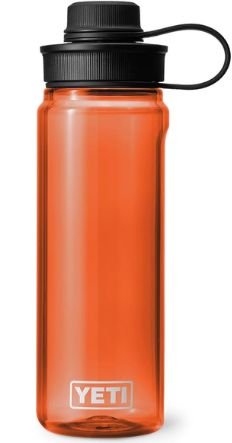
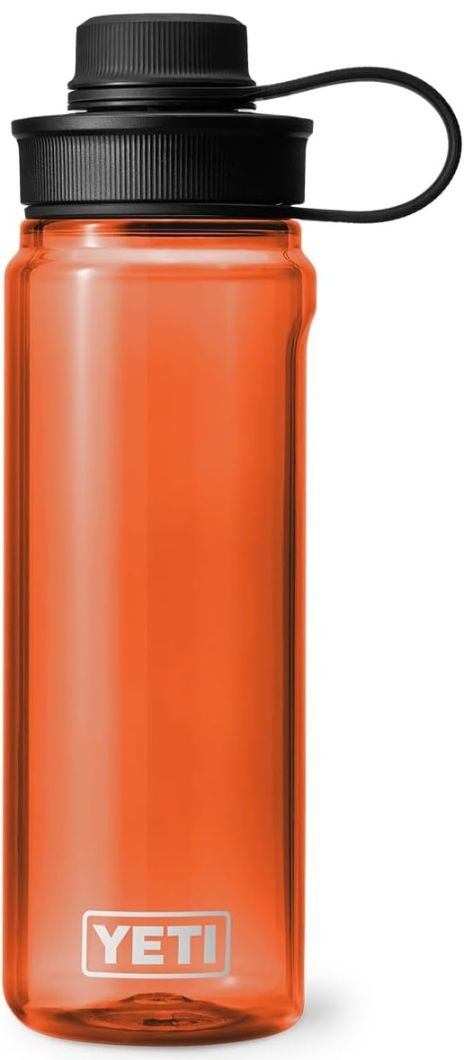
1st Place: YETI Yonder
KEY FEATURES
PROS
CONS
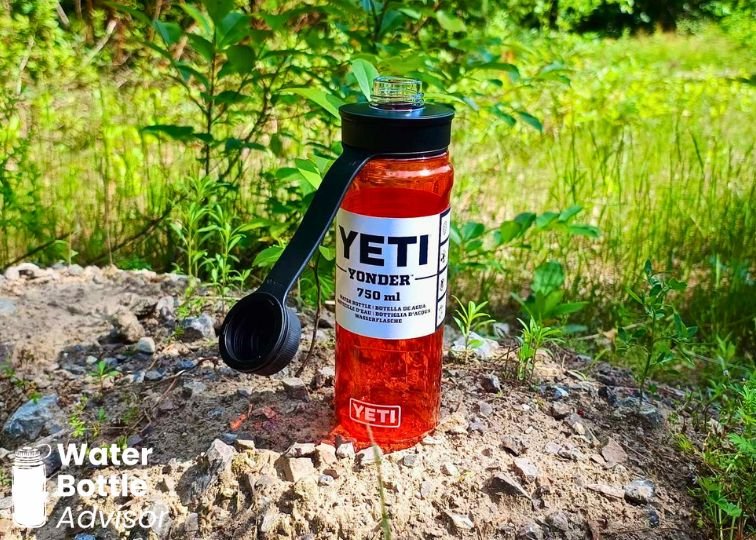
The easiest bottle to clean in my test was the YETI Yonder.
It took me 1 minute and 38 seconds to disassemble and clean it properly, which is about as fast as it gets without pretending a quick rinse counts as cleaning.
I used the Yonder with the Tether Cap, which is my favorite lid for this bottle. In that setup, there are only three parts:
- The bottle
- The lid
- The cap
That’s it. The video below shows how quick and painless it is to wash.
The only tool I needed was a narrow bottle brush to reach the bottom of the bottle. The cap and lid are also easy to clean with the same brush, and putting everything back together takes only a few seconds once the parts are dry.
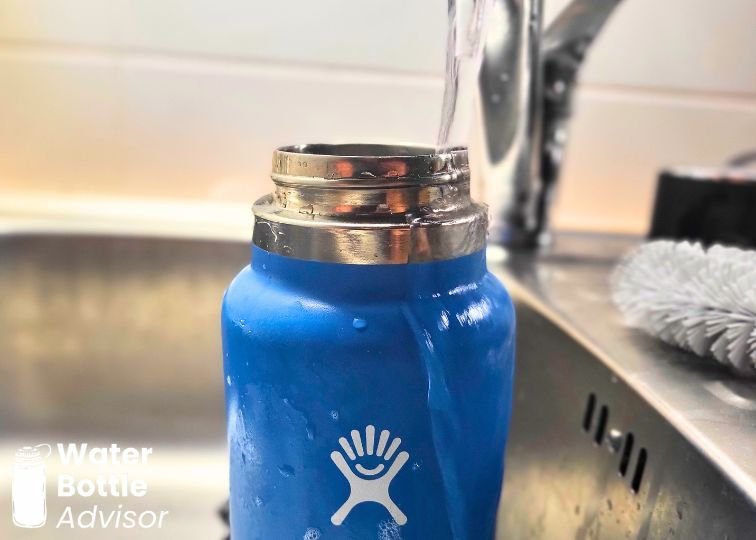
The Yonder is also transparent, which helps, because you can actually see whether the inside is clean. With stainless steel bottles, you sometimes have to trust your brush and hope there’s no old electrolyte powder clinging to the bottom.
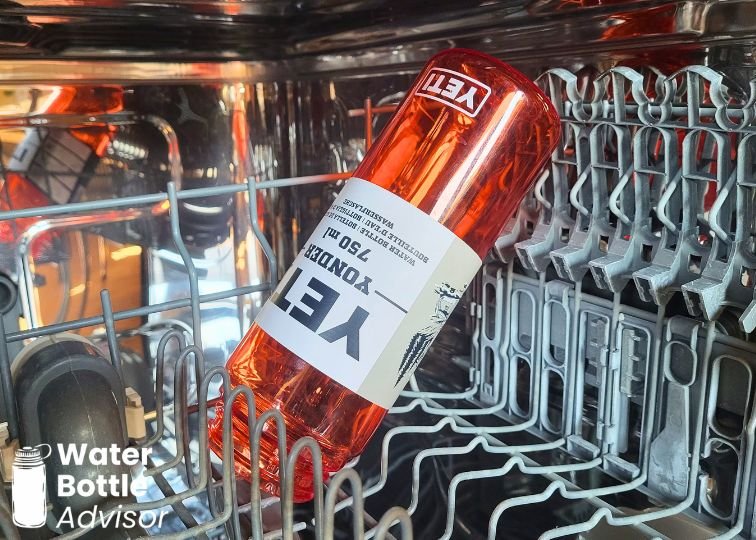
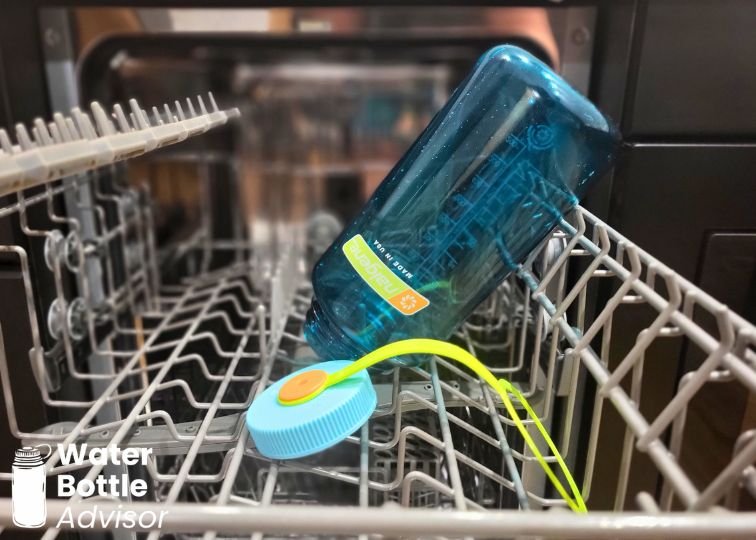
And on the days when you really don’t feel like scrubbing anything by hand, the Yonder can go straight in the dishwasher.
Outside cleaning, the Yonder is one of my favorite plastic bottles. It’s made from BPA-free Tritan, and my 25 oz size weighs only 8.25 oz empty. That makes it a great pick for hiking, walks, and any situation where you don’t want a heavy insulated bottle swinging around.
I paid $25 for mine, and the Tether Cap is the main reason I think the price makes sense. The loop is one of the most comfortable I’ve used on a bottle, and I can carry it for a long time without it digging into my fingers. The cap is also attached, so you’re less likely to lose it on a trail, in the car, or somewhere in the strange black hole between your couch cushions.
The spout has a good size too. Big enough for chugging, but not so wide that water splashes all over your face.
The only thing to remember is that the Yonder is a plastic bottle, so it will sweat with cold drinks and ice. If condensation bothers you, stainless steel will make more sense.
But for cleaning? The Yonder is the best I’ve tested.
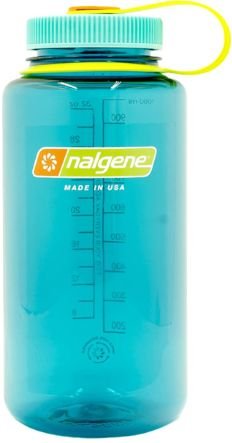
2nd Place: Nalgene Wide Mouth
KEY FEATURES
PROS
CONS
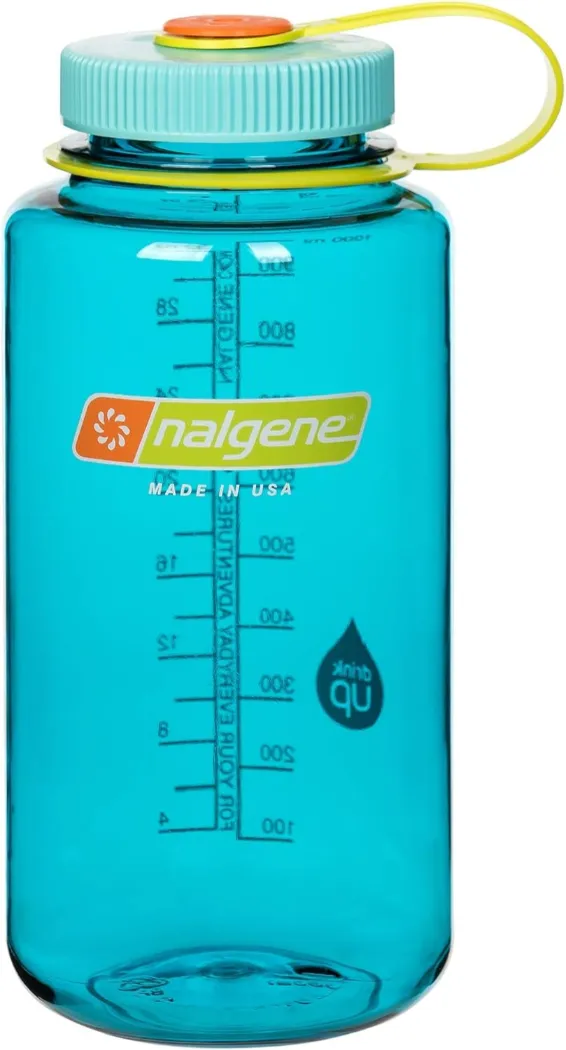
The Nalgene Wide Mouth has even fewer parts than the YETI Yonder.
There are only two:
- The bottle
- The lid
You can’t really get simpler than that unless you drink straight from a measuring cup. In my test, it took me 1 minute and 54 seconds to clean. That’s still very fast, especially for a 32 oz bottle.
The wide mouth helps a lot. You can reach most areas easily, and the transparent body makes it simple to check if the inside is clean. If you only use your Nalgene for water, cleaning is almost stupidly easy.
I still like using a straw brush around the cap threads and small crevices, especially if I add electrolytes, drink mixes, or anything powdery. Nalgene’s measurement markings make it great for mixing drinks, but once you start adding powders, you need to clean a bit more carefully.
The one small annoyance is the retaining strap.
I’ve owned Nalgene bottles for years, and somehow I still sometimes struggle to get that strap seated around the neck properly. Maybe this is a personal defect. Maybe the strap is secretly designed to humble people. Either way, it can take me a few tries.
The strap also digs into my fingers if I carry the bottle by it for too long. That’s one area where the YETI Yonder is much better. YETI’s loop feels more comfortable and more thought out.
Still, the Nalgene is a classic for a reason. It’s simple, lightweight, affordable, made in the USA, and very easy to clean.
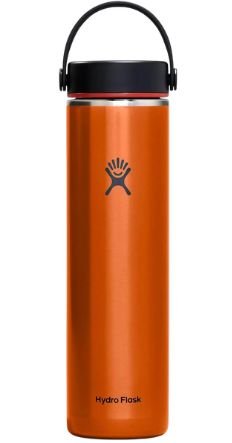
3rd Place: Hydro Flask Trail Series
KEY FEATURES
PROS
CONS
After the plastic bottles, the easiest stainless steel bottle I’ve cleaned is the Hydro Flask Trail Series.
Hydro Flask also calls this its lightweight line, and that name actually checks out. My bottle weighs only 10.2 oz empty, which is very light for insulated stainless steel.
In my cleaning test, it took me 1 minute and 54 seconds, the same time as the Nalgene. For an insulated steel bottle, that’s fast.
There are three parts:
- The bottle
- The Flex Cap
- The gasket inside the cap
The bottle itself is easy enough, but because the Trail Series is tall, you’ll need a long narrow brush to reach the bottom.
The Flex Cap also has threads and small inner crevices, so I like using a straw brush there. It’s not difficult, but you should spend a little time on it if you use the bottle often.
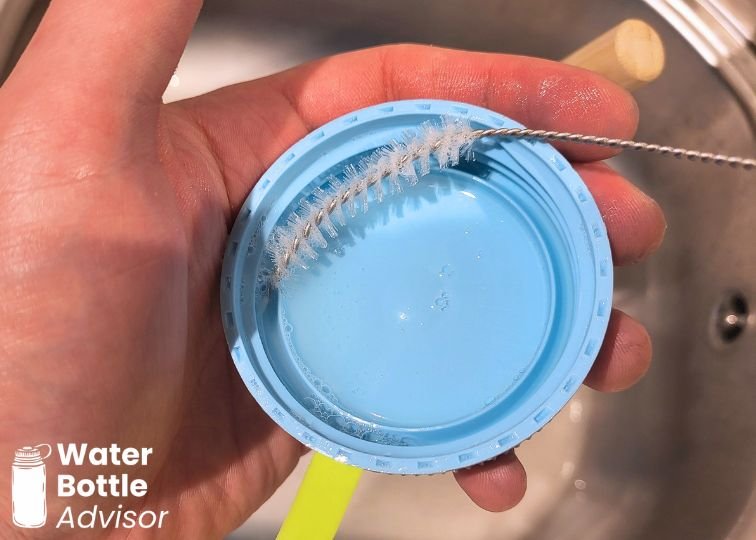
The gasket is the part many people miss.
It sits inside the cap, it’s transparent, and it doesn’t exactly wave at you begging to be cleaned. You probably won’t notice it unless you already know it’s there. But ignore it long enough, and it can become the reason your bottle smells bad even after you washed everything else.
I take it out with a toothpick, clean it, let it dry, and put it back in.
The Trail Series is also one of the most useful bottles here because it handles both cold and hot liquids well. You get insulation, low weight, and a cleaning process that doesn’t make me sigh before I even start.
For a stainless steel bottle, this is one of the easiest choices to live with.
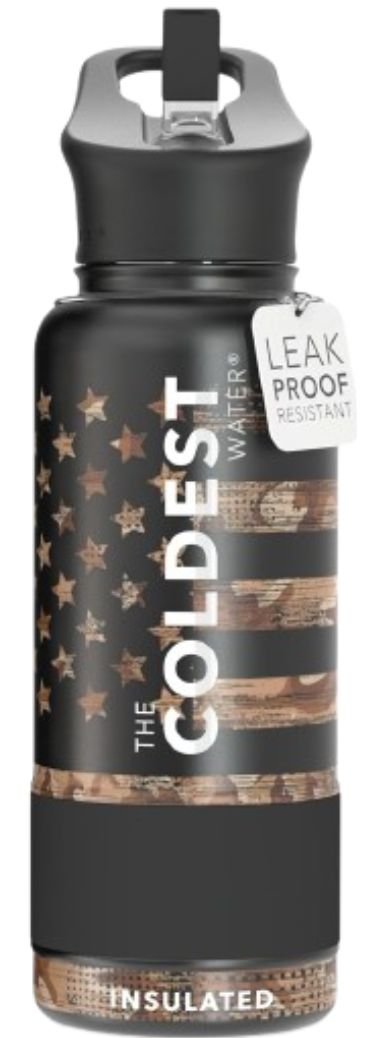
4th Place: Coldest Bottle
KEY FEATURES
PROS
CONS
The Coldest Bottle is my best water bottle right now, mostly because its insulation is so strong.
It’s also fast to clean.
In my test, it took me 1 minute and 58 seconds to clean the main parts:
- The bottle
- The lid
- The straw
You’ll need a long narrow brush for the bottle and a straw brush for the straw, but that’s pretty normal for this type of bottle.
The only thing I don’t love is the gasket situation.
There are gaskets inside the lid, maybe even two depending on how you count the sealing areas, but they are so tight that I don’t remove them for regular cleaning. They may not be meant to come out at all.
That’s not automatically a disaster, but I prefer removable gaskets. If a gasket can come out, I can clean it properly and dry it properly.
With the Coldest, I clean around the gasket carefully with a small brush and make sure the lid dries fully. So far, I haven’t had a smell problem with it, but this is one of those bottles where regular cleaning matters.
If you rinse it once every four business days and leave the lid wet, don’t blame the bottle when things get weird.
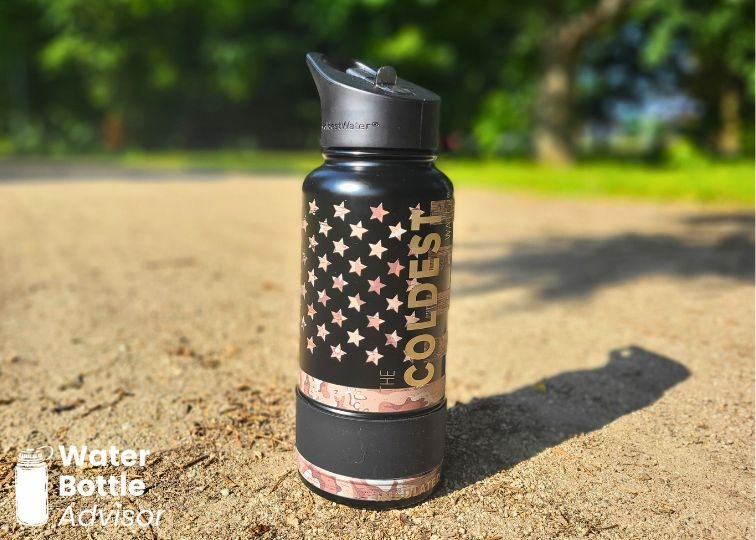
Even with that caveat, the Coldest is still one of the faster bottles to clean in my collection. It gives you strong insulation, a straightforward straw setup, and no ridiculous puzzle pieces.
There’s much more to this bottle than cleaning, so if you want the full breakdown, see my Coldest bottle review.
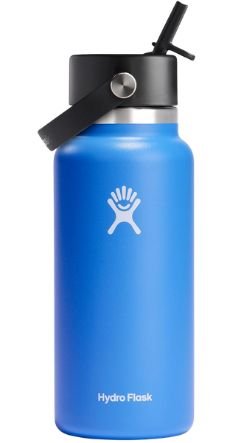
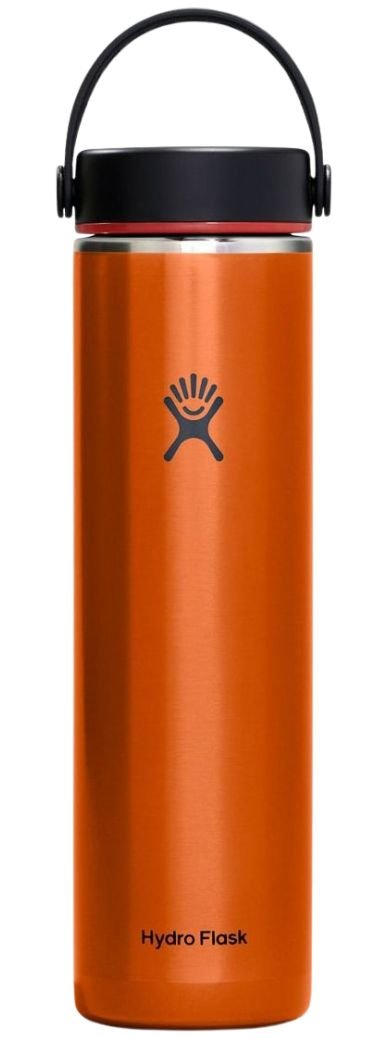
5th Place: Hydro Flask Wide Mouth
KEY FEATURES
PROS
CONS
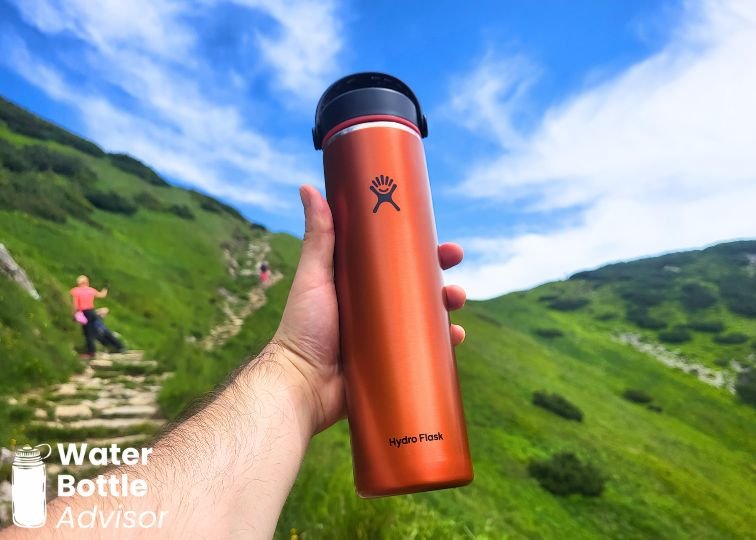
The classic Hydro Flask Wide Mouth is almost as easy to clean as the Trail Series.
It’s heavier than the Trail Series (my 32 oz size weighs 15.5 oz empty) but it also has a more durable feel, a powder-coated finish, and slightly better thermal performance in my testing.
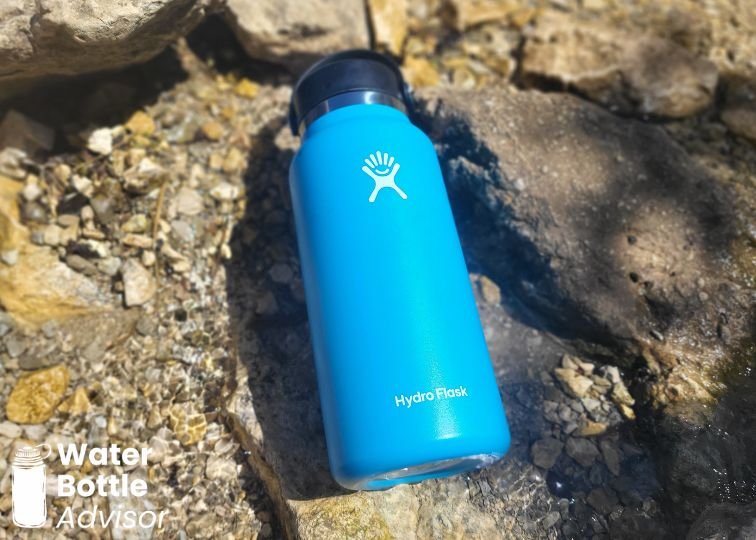
For cleaning, it did very well.
It took me 2 minutes and 6 seconds to clean it, which is still quick for an insulated stainless steel bottle.
For this test, I used the standard Flex Cap. That setup has three parts:
- The bottle
- The cap
- The gasket inside the cap
Like the Trail Series, you’ll want a long narrow brush to clean the bottle and a straw brush for the inside of the cap. The gasket should come out too, and I use a toothpick for that.
The Flex Cap is not hard to clean once you know where everything is. But Hydro Flask also sells several other lids, and cleaning difficulty can change depending on which one you use. The Flex Straw Cap, for example, adds a straw, spout, and gasket, so it takes a little longer. Still, I’ve cleaned all of Hydro Flask’s main lids, and none of them were terrible.
The classic Hydro Flask is expensive, usually around $45 for a 32 oz size, but mine has outlived a lot of cheaper bottles. It’s one of those bottles I keep coming back to because it handles daily use well and doesn’t punish me at the sink.
Bottles I Found Harder to Clean
Now for the bottles that demand more time, more tools, and sometimes more emotional control.
For me, the hardest bottles to clean usually:
- have at least six parts,
- take more than three minutes,
- or make assembly and disassembly more difficult than it should be.
That doesn’t mean they’re bad bottles. Some of them are excellent in other areas. But if cleaning speed is your top priority, these are not the ones I’d put at the top of the list.
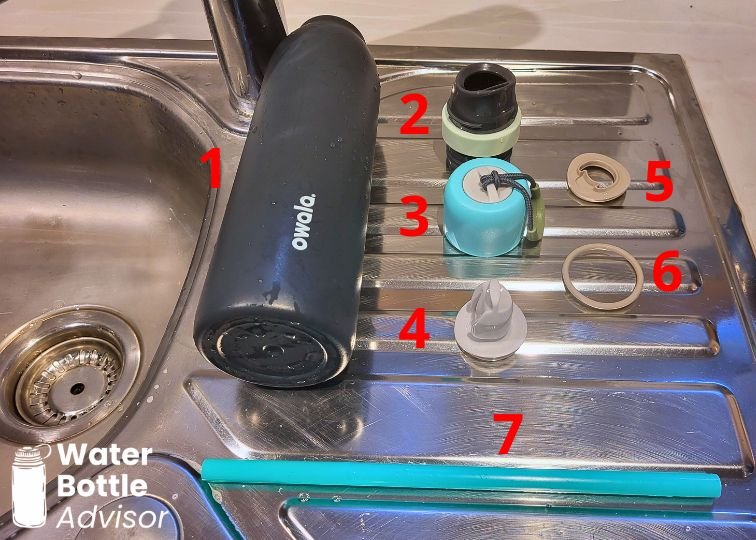
Owala FreeSip
The classic Owala FreeSip is not awful to clean, but it takes more time than the easiest bottles.
In my test, it took me 3 minutes and 13 seconds.
That’s because the lid is larger and has more hidden areas. You need to spend time around the drinking spout, straw connection, silicone parts, and inner corners. A quick rinse is not enough if you use it daily, especially with anything other than water.
The FreeSip also has two gaskets and a straw, so there’s simply more to deal with.
If you own one, I’d use a straw brush and pay attention to the lid. That’s where smells usually start.

Owala FreeSip Twist
The Owala FreeSip Twist takes even more work.
It has seven parts, which is a lot for one bottle. More parts mean more surfaces touching liquid, more places for residue to hide, and more pieces to dry before you put everything back together.
In my test, the process took 3 minutes and 33 seconds.
That may not sound terrible on paper, but you feel it when you do it every day.
The FreeSip Twist is still a good bottle in many ways. I like that it can handle cold, hot, and carbonated drinks. But if we’re talking strictly about cleaning, it’s not one of the easy ones.
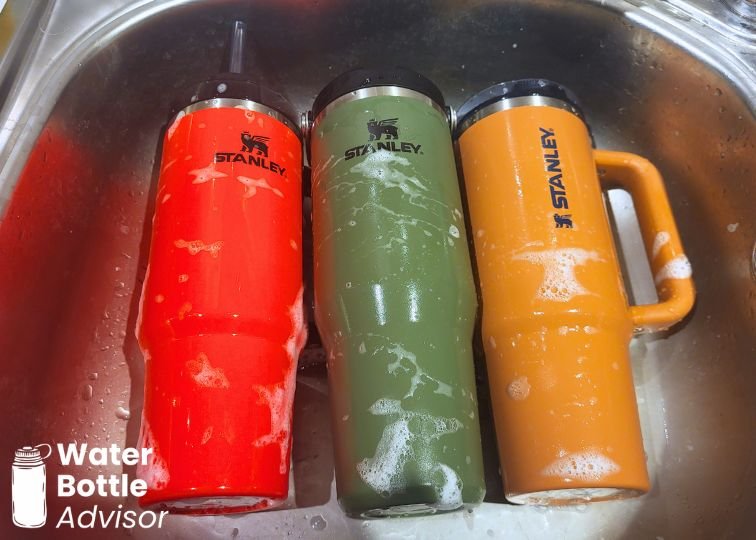
Stanley Tumblers
The hardest drinkware to clean in my collection has been Stanley tumblers.
That includes the IceFlow, ProTour, and Quencher.
Yes, they’re tumblers, not traditional bottles, but they still fall into the same daily drinkware category. And since many people use them like water bottles, I’m counting them here.
The one easy part is the cup itself. Stanley tumblers have wide mouths, so cleaning the inside of the tumbler is simple. You can reach in with a sponge, and you don’t need a long bottle brush.
Then you get to the lid.
The IceFlow and ProTour both have spouts that need to be pulled out from the grooves, and they can take real force. I’m not being dramatic here. My fingers have actually hurt after taking them apart.
The Quencher is even more annoying.
The Quencher lid has several parts, and if you use it with coffee, sugary drinks, or anything other than water, you really should clean each one. Otherwise, residue sits in the lid, the silicone parts start to smell, and your expensive tumbler becomes a fancy little swamp.
In my test, the Quencher took almost 4 minutes to clean, and that was not my first time doing it. The first time I tried to figure out the whole lid, it took me more than 10 minutes.
The Quencher, ProTour, and IceFlow can still be good tumblers. But easy to clean? No. Not compared with the bottles at the top of this list.
If you own one and want to avoid frustration, see my full guide on how to clean Stanley tumbler lids.
What Makes a Bottle Easy to Clean?
The easiest bottles usually have:
- A wide mouth
- A simple lid
- Fewer than four parts
- No hidden gaskets
- No complicated spouts
- No tiny grooves around the drinking area
- A transparent body, if it’s plastic
- Parts that come apart without force
The hardest bottles usually have the opposite: hidden silicone pieces, folding straws, small channels, awkward gaskets, and lids that look simple until you start pulling them apart.
A bottle doesn’t need to be boring to be easy to clean. But the simpler the lid, the better your odds.
If you mostly drink plain water, you can get away with easier daily cleaning. If you use coffee, tea, electrolytes, protein drinks, smoothies, or sweet drinks, be more careful. Sugar and residue love hiding in gaskets and spouts.
That’s where the smells start.
My Cleaning Kit Recommendation
You don’t need a full laboratory setup to keep bottles clean, but usually you do need more than a sponge.
At minimum, I’d keep these around:
- A long narrow bottle brush
- A straw brush
- Toothpicks for removing gaskets
- A drying rack or open space where parts can dry fully
The drying part matters. A clean gasket that gets shoved back into a damp lid can still end up smelling bad. Let the parts dry before assembling the bottle again. I break down my full cleaning routine in my guide on how to clean a water bottle.
Final Thoughts
Cleaning is not the feature most people get excited about when buying a bottle.
Color gets attention. Insulation gets attention. Leakproof lids get attention. Cleaning usually gets ignored until the bottle starts smelling weird and you’re standing at the sink trying to remove a gasket you didn’t know existed.
If you want the easiest bottle to clean, I’d start with the YETI Yonder. It was the fastest in my test, the lid is simple, and there are no annoying hidden parts.
If you want maximum simplicity, Nalgene is still hard to beat.
If you want stainless steel and easy cleaning, I’d go with the Coldest Bottle, Hydro Flask Trail Series or the classic Hydro Flask Wide Mouth.

Jeremiah Kowalski
Jeremiah Kowalski is a drinkware product researcher who has personally tested 50+ reusable water bottles, tumblers, mugs, and filtration systems from leading brands. He focuses on real-world performance, durability, and safety to help readers choose drinkware that actually fits their daily hydration needs.